
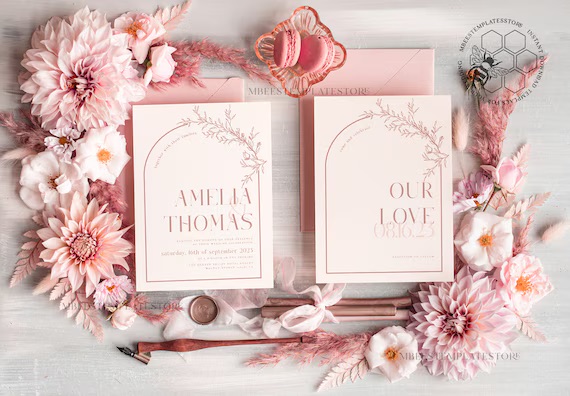
In an increasingly digital age, the tangible appeal of a physical invitation remains unparalleled. To print custom invitations is to embark on a journey of translating your unique vision, event style, and personal touch into a physical piece that guests can hold, admire, and keep as a cherished memento. It’s about setting the tone, building anticipation, and making an unforgettable first impression that a generic invitation simply cannot achieve.
Why Choose Custom Printed Invitations?
Opting to print custom invitations offers numerous distinct advantages:
- Uniqueness & Personalization: Your invitation becomes a true reflection of your personality, event theme, or brand identity. Every detail, from the paper to the font, can be tailored precisely to your vision, ensuring no one else has an invitation exactly like yours.
- Enhanced Experience: A custom-designed and professionally printed invitation offers a superior tactile and visual experience. The quality of the paper, the chosen printing technique, and the thoughtful design all contribute to a sense of occasion and luxury.
- Brand Reinforcement (for Businesses): For corporate events, galas, or product launches, custom invitations reinforce your brand’s professionalism, attention to detail, and commitment to quality.
- Higher Perceived Value: Guests often perceive custom invitations as a sign of a more significant and well-planned event, increasing excitement and attendance.
- Keepsake Potential: Beautifully designed custom invitations are frequently saved by guests as mementos, serving as a lasting reminder of a special day.
The Journey to Print Custom Invitations: A Step-by-Step Guide
Successfully printing custom invitations involves a structured process, blending creative design with practical considerations.
Step 1: Conceptualization & Vision Board 💡
Before you even think about printing, clearly define your event’s theme, formality, and desired aesthetic.
- Event Type: Wedding, birthday, corporate gala, baby shower, product launch?
- Style: Formal, rustic, modern, whimsical, elegant, minimalist?
- Color Palette: What colors represent your event or brand? Consider the emotional impact of colors.
- Inspiration: Gather ideas from Pinterest, design blogs, stationery shops, or even art. Create a mood board to consolidate your visual preferences.
- Key Information: Outline all essential details that need to be conveyed: date, time, venue, RSVP details, dress code, etc.
Step 2: Design Your Invitation (or Hire a Designer) 🎨
This is where your vision takes shape. You have several options for creating the actual design file:
- Hire a Professional Designer: For truly unique, high-end, and perfectly executed designs, a graphic designer or a specialized stationery designer is invaluable. They understand print requirements, typography, and visual hierarchy. This is the recommended path for complex designs or if you want minimal stress.
- Use Online Design Platforms (DIY with Customization):
- Canva, Adobe Express, Zazzle, Etsy (templates): These platforms offer customizable templates that you can adapt with your text, colors, and sometimes upload your own elements. They are excellent for those with a creative eye but limited design software experience. Be sure to check licensing for any elements used.
- Specialized Online Invitation Makers: Many printing companies (like Vistaprint, Minted, Shutterfly, etc.) have their own online design tools with templates that integrate directly with their printing services.
- Use Professional Design Software (Advanced DIY): If you have experience with tools like Adobe Illustrator, Adobe InDesign, or Affinity Designer, you have complete control over every aspect of your design, allowing for complex layouts, custom illustrations, and perfect print-ready files.
Step 3: Choose Your Paper Stock & Envelopes 📜
The tactile feel of your invitation is paramount. This choice heavily influences the final aesthetic and cost.
- Weight (GSM/lb): Heavier paper (e.g., 250 GSM or 90lb cover stock and above) conveys luxury and durability. Lighter stocks are more economical.
- Texture & Finish:
- Smooth/Uncoated: Natural, elegant, good for absorbing details like letterpress.
- Matte: Non-reflective, sophisticated.
- Gloss/Coated: Shiny, vibrant colors, often used for photographic designs.
- Linen/Textured: Adds a subtle tactile dimension.
- Cotton: Luxurious, soft, ideal for letterpress.
- Recycled/Kraft: Earthy, rustic.
- Color: Beyond traditional white or ivory, consider colored cardstock that complements your design.
- Envelopes: Choose envelopes that match or beautifully complement your invitation’s paper stock and color palette. Consider liners for an added touch of elegance.
Step 4: Select Your Printing Method 🖨️
This decision dramatically impacts the look, feel, and cost of your custom invitations.
- Digital Printing (Flat Print): Most common and budget-friendly. Ink sits flat on the paper. Excellent for full-color designs, photographs, and intricate details.
- Letterpress: Ink is pressed into thick, soft paper, creating a debossed, tactile impression. Offers a luxurious, artisanal, and slightly vintage feel. Perfect for simple, elegant designs.
- Foil Stamping: Uses heat and pressure to apply metallic (gold, silver, rose gold) or pigmented foils onto the paper, creating a luxurious, shimmering effect. Great for names, monograms, or borders.
- Thermography: Creates raised, glossy text that mimics engraving but is more cost-effective.
- Engraving: The most formal and traditional method, creating raised text by etching a design onto a metal plate and pressing the paper into it.
- Embossing/Debossing: Creates a raised (embossing) or recessed (debossing) design on the paper without ink, relying on shadows and texture for impact. Ideal for subtle patterns or monograms.
- Die-Cutting: Precision cutting of custom shapes or intricate patterns into the paper, adding a unique silhouette or detail.
- Laser Cutting: Similar to die-cutting but uses lasers for even more intricate and delicate patterns, often used for ornate borders or decorative sleeves.
- UV Spot Varnishing: Applying a glossy, transparent coating to specific areas of the design to create shine and texture contrast.
Step 5: Final Review & Proofing – Meticulous Attention to Detail ✅
This step is critical. Do not rush it.
- Content Accuracy: Meticulously check all names, dates, times, venues, addresses, and contact details. Even small errors can cause big problems. Have multiple people proofread.
- Design Proofs: Always request digital proofs (PDFs) from your printer. Check colors, alignment, and legibility. For critical orders, request a physical print proof if available, as colors on screen can vary from printed output.
- Confirm Specifications: Ensure paper stock, dimensions, quantity, and printing method are all correct according to your order.
Step 6: Choose Your Print Partner and Place Your Order 🏭
- Online Printers: Convenient and often budget-friendly (e.g., Vistaprint, Zazzle, Minted, Basic Invite, Shutterfly). They have easy-to-use interfaces and template libraries.
- Local Print Shops/Stationers: Offer a more personalized experience, hands-on advice, and often specialize in high-end techniques like letterpress or custom die-cutting. They can provide physical samples and more direct communication.
- Consider Turnaround Time: Factor in production time (which varies greatly by printing method) and shipping when setting your mailing date.
By diligently following these steps, you can confidently navigate the exciting process of how to print custom invitations, ensuring your event begins with a touch of elegance and personal flair that your guests will truly appreciate.